A radiator that is warm at the bottom but cold at the top is usually not a sign that it needs replacing. More often, air has become trapped inside and is stopping hot water from circulating through the whole panel. Knowing how to bleed radiators properly can restore even heat, reduce irritating gurgling sounds and help your heating system work as it should.
It is a straightforward household task, but the details matter. Bleeding a radiator at the wrong time, opening the valve too far or ignoring a drop in boiler pressure can create unnecessary problems. The aim is simple: release trapped air, not a large amount of heating water.
When does a radiator need bleeding?
The classic symptom is a cold patch at the top of the radiator while the lower section feels warm. You may also hear bubbling, trickling or knocking noises when the heating is running. These signs suggest air is trapped in the system and rising to the highest part of the radiator.
Do not confuse this with a radiator that is cold at the bottom. That can point to a build-up of sludge or debris inside the radiator, which bleeding will not fix. A radiator that is cold all over may have a closed valve, a stuck thermostatic radiator valve, an issue with system circulation or a boiler fault.
If just one radiator has a cool top edge, bleeding that radiator may be enough. If several radiators are affected, work through the system carefully and check the boiler pressure afterwards.
Before you bleed radiators, make the system safe
Switch your central heating off and allow the radiators to cool fully before you begin. Hot water can escape from the bleed valve, and a hot radiator makes it harder to judge where the cold spots are. Turning the heating off also gives trapped air time to rise to the top of each radiator.
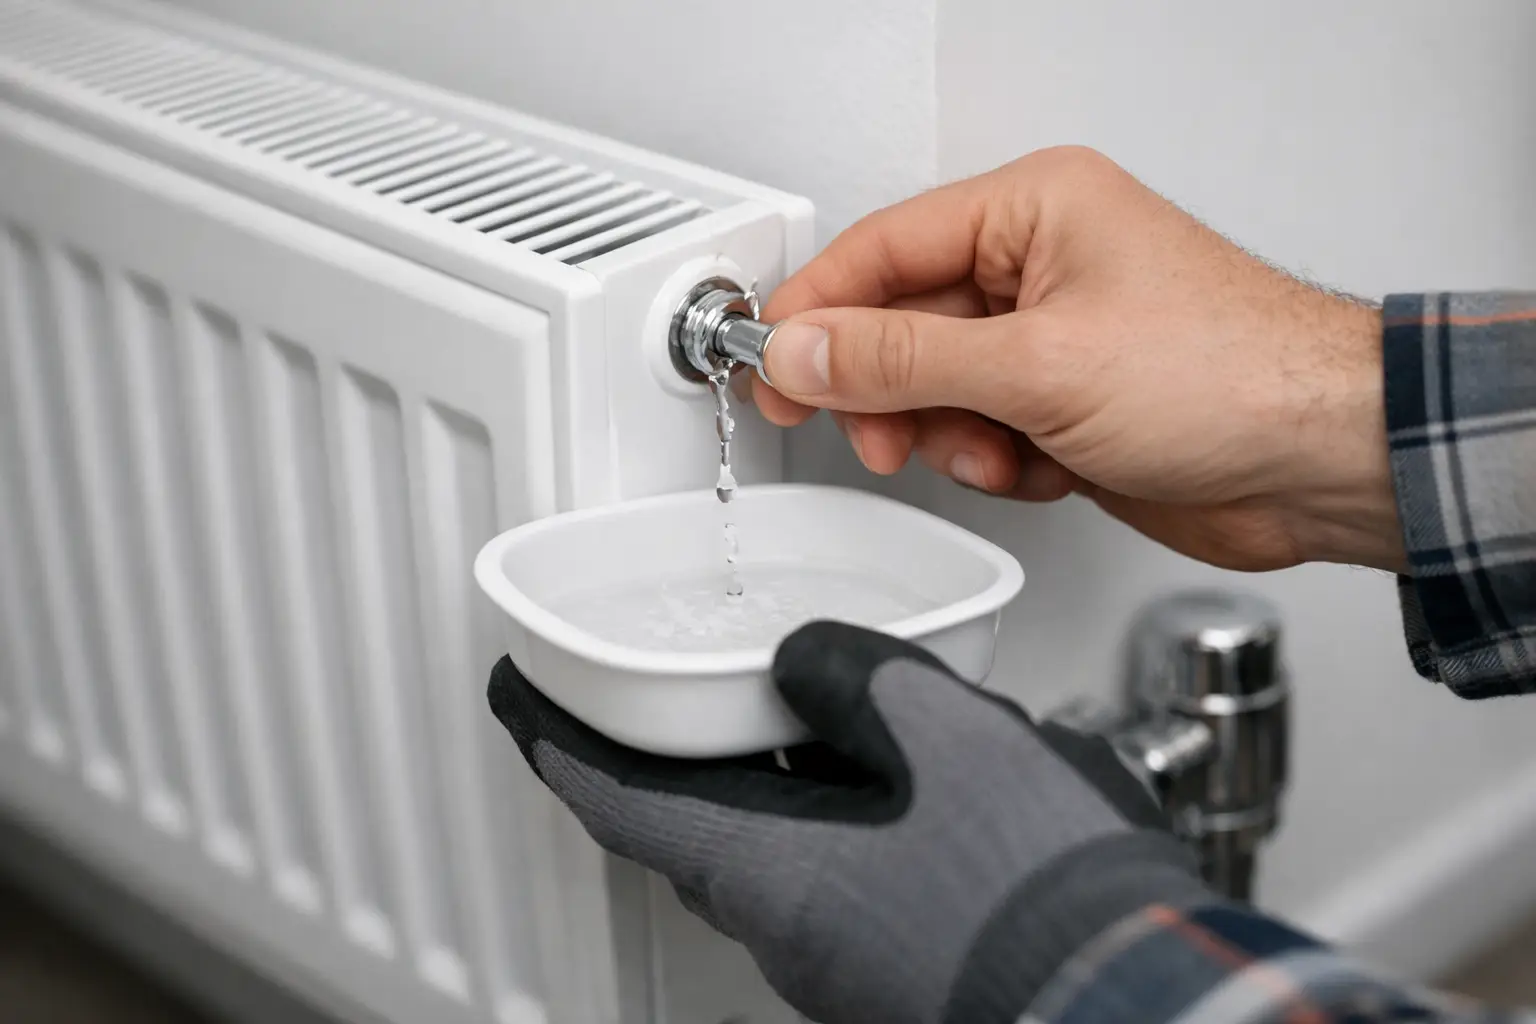
You will need a radiator bleed key for most standard valves, plus a dry cloth or small container to catch any water. Some modern radiators have a bleed screw that can be turned with a flat-head screwdriver, but do not force it if you are unsure. Using the wrong tool can damage the valve head.
If you have a sealed heating system, take a look at the pressure gauge on your boiler before starting. When the system is cold, many homes operate at around 1 to 1.5 bar, though the correct setting depends on the boiler and installation. Make a note of the reading so you can spot a meaningful pressure drop when you finish.
How to bleed radiators properly: the right method
Start with the radiators that need attention
If you are only dealing with one cold-topped radiator, start there. If several need bleeding, take a systematic approach. Many households begin downstairs and work upwards because air naturally rises, leaving upper-floor radiators more likely to hold it. In larger properties, it can also help to work away from the boiler in a logical order so that no radiator is missed.
The exact order is less important than doing the job methodically and checking every radiator with the heating off. There is no benefit in bleeding radiators that are heating evenly and show no signs of trapped air.
Locate and open the bleed valve slowly
The bleed valve is usually found at the top corner of the radiator, opposite the thermostatic control or manual valve. Hold your cloth or container directly underneath it. Insert the radiator key securely, then turn it anti-clockwise by a small amount – usually no more than a quarter turn.
You should hear a gentle hissing sound. This is the trapped air escaping. Keep the valve only slightly open; it does not need to be fully unscrewed.
Wait for a steady trickle of water
When the hissing stops, water should begin to emerge. As soon as you see a steady trickle rather than a few splutters, turn the key clockwise to close the valve. Wipe the area dry and check that the valve is not weeping.
Do not leave the room while a bleed valve is open. Even a small valve can release more water than expected if it is opened too far or fails to close correctly.
Repeat, then check the boiler pressure
Continue around the radiators that need bleeding. Once finished, check your boiler pressure gauge again. Releasing air may lower the pressure in a sealed system, especially if several radiators have been bled.
If the pressure has fallen below the level recommended in your boiler manual, it may need topping up using the filling loop or built-in filling arrangement. Only do this if you are confident you know the correct process for your boiler. Add water slowly and stop at the recommended cold pressure – over-pressurising the system can cause its own faults.
Homes with an older open-vented system may not have a pressure gauge or filling loop. These systems are supplied from a small tank, usually in the loft, so the checks are different. If you are unsure which system you have, do not guess. A qualified heating engineer can confirm it quickly.
Turn the heating back on and test each radiator
Once the valves are closed and the system pressure is correct, turn the heating back on. Give the radiators time to warm up, then carefully feel across each one. They should heat more evenly from top to bottom.
Check the bleed valves again after the system has warmed up. A damp patch beneath a valve may mean it has not fully sealed or that the valve is worn. A small issue is best dealt with early, before it becomes a leak.
Common mistakes that cause avoidable problems
Bleeding radiators while the heating is running is one of the most common mistakes. The water can be very hot, and moving water may make the process less effective. Always switch the heating off and wait until the system is safe to handle.
Another mistake is opening the valve too far. The goal is to release air gradually, not remove the bleed screw. A slow turn and a cloth held underneath will keep the job clean and controlled.
It is also easy to overlook boiler pressure. If your boiler loses pressure after bleeding, it may lock out or stop heating your home until it is repressurised. Check the gauge both before and after the work, particularly on a combi boiler or other sealed system.
Finally, do not assume every cold radiator contains air. Bottom-cold radiators, repeated cold spots and brown or black water from a radiator can indicate sludge. That may require a system clean, magnetic filter check or professional investigation rather than repeated bleeding.
When repeated bleeding points to a bigger fault
A properly maintained heating system should not need constant bleeding. If you have to release air every few weeks or months, there may be an underlying cause. It could be a small leak drawing air into the system, a faulty expansion vessel, corrosion within the system, incorrect system pressure or an issue with the automatic air vents.
Watch for pressure that repeatedly falls, stains beneath radiators or pipework, dripping safety discharge pipes outside, and boiler fault codes. These are not problems to ignore. Continually topping up a sealed heating system introduces fresh water and oxygen, which can accelerate internal corrosion over time.
A gas boiler should only be inspected, repaired or adjusted by a Gas Safe registered engineer. Bleeding a radiator is generally safe for a homeowner, but diagnosing recurring pressure loss, boiler faults or circulation problems requires the right knowledge and equipment.
A simple maintenance habit that protects your heating
Check your radiators at the start of the colder season, before you rely on them every day. Run the heating, feel for uneven warmth and deal with a small air pocket before it becomes a room that never quite heats up. Keep your boiler serviced annually as well, particularly if it is older or has shown pressure issues in the past.
If your radiators still heat unevenly after bleeding, or your boiler pressure will not stay stable, Walsh Plumbing & Heating can assess the system and explain the repair options clearly. A warm home should not depend on trial and error – a timely check can prevent a minor heating issue becoming an inconvenient breakdown.